What Is the Best Way to Troubleshoot Tow Truck Hydraulic Leaks?

Time:2026-10-13 Author:Sophia
0%

Hydraulic leaks can turn a dependable tow truck into a safety risk within minutes. A small amber stain beneath the boom may signal a loose fitting, damaged hose, or failing cylinder seal. This guide explains how to troubleshoot hydraulic leaks in a tow truck using practical inspection methods and manufacturer-approved procedures.

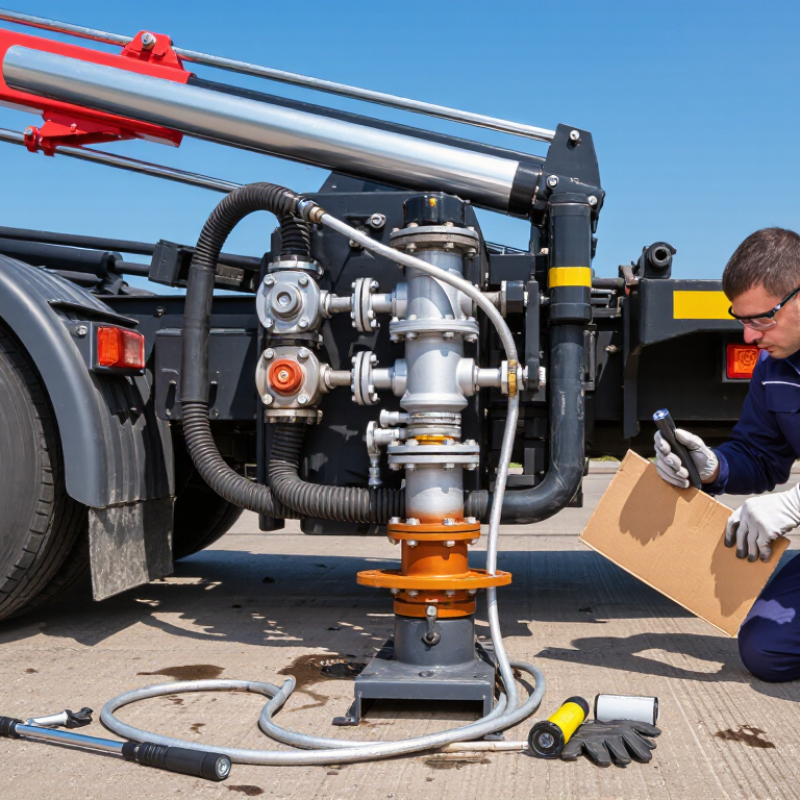
Begin with the truck parked on firm, level ground. Lower the boom and release hydraulic pressure before touching any component. Never search for a leak with bare hands; pressurized fluid can penetrate skin without leaving a large visible mark. Use cardboard, a flashlight, clean gloves, and eye protection instead. Check the reservoir level, hose connections, valve blocks, pump fittings, and cylinder rods. Fresh fluid often appears glossy, while older residue collects dust and looks dark.

A visual check can mislead. Wipe the area clean, operate the system briefly from a safe position, and inspect again. Small bubbles near a fitting may indicate suction-side air entry rather than an outward leak. Do not simply tighten every connection. Over-tightening can damage threads, seals, or hose ends. Follow the service manual for torque values and replacement parts. Experienced technicians also record the leak location, fluid type, operating temperature, and repair date. That detail helps reveal recurring failures.

Some diagnoses remain uncertain. A hose may look sound but fail internally under pressure. If the leak returns, the hydraulic system behaves erratically, or a cylinder continues drifting, stop operation and contact a qualified service professional. Reliable troubleshooting protects the operator, the vehicle, and everyone nearby.
What Is the Best Way to Troubleshoot Tow Truck Hydraulic Leaks?

Define the Leak Type and Trace the Circuit at 2,000–3,000 psi

Troubleshooting a tow truck hydraulic leak starts with identifying its behavior. A misting spray usually indicates a pressurized hose, fitting, or valve connection. A slow wet mark may come from a seal, reservoir return line, or loose clamp. Internal leakage is harder to see. The equipment may drift, lift slowly, or lose holding force without visible oil.

I have learned that cleaning the area first prevents old fluid from misleading the inspection. Use lint-free cloths and a bright inspection light. Never search for a leak with bare hands.

Trace the circuit from the pump to the control valve, cylinder, and return line. Use the hydraulic schematic and connect pressure-rated gauges at approved test points.

Operate the system remotely while observing from a safe position. Many tow truck circuits work near 2,000–3,000 psi, so every hose, gauge, and adapter must exceed the measured pressure.

A piece of cardboard can reveal a spray pattern without exposing skin. Stop the system and release stored pressure before tightening or replacing components.

Check temperature changes, because warm oil can create a leak that disappears when cold. My first assumption is not always correct. A leaking cylinder may actually reflect a worn valve or restricted return path.

Record pressure, load, oil level, and leak location before making repairs. Incomplete notes often create repeat failures.

Apply ISO 4413 Isolation Procedures and Verify Zero Stored Pressure

What Is the Best Way to Troubleshoot Tow Truck Hydraulic Leaks?

A hydraulic leak demands controlled isolation, not guesswork. ISO 4413 isolation procedures provide a practical safety framework during inspection. Park the tow truck on firm, level ground, apply the parking brake, and support raised equipment mechanically. Never rely on hydraulic pressure alone to hold a boom or wheel lift.

Stop the engine and isolate every energy source, including electrical controls and hydraulic supply lines. Apply a lock and identification tag where the system permits it. Move controls only through the approved pressure-release procedure. Bleed trapped fluid through designated ports, not by loosening a hose or fitting. Check accumulators, counterbalance valves, and elevated loads. Pressure can remain hidden.

Verify zero stored pressure with system gauges and a suitable test method. A gauge reading of zero is useful, but it is not always conclusive. I have seen a quiet hose release pressure after isolation because a valve trapped fluid. Keep clear of connection points, wear eye and hand protection, and never search for a leak with bare fingers. Use cardboard or an approved detection method instead.

Inspect hose crimps, fittings, cylinder seals, and abrasion points after the system is safe. Clean residue first, then look for fresh oil under normal lighting. Record the leak location and pressure conditions. My own checks have sometimes missed seepage near clamps, so a second inspection is worthwhile. Replace damaged components according to the equipment procedure, then restore pressure slowly and watch for movement or renewed leakage.

What Is the Best Way to Troubleshoot Tow Truck Hydraulic Leaks? - Apply ISO 4413 Isolation Procedures and Verify Zero Stored Pressure

Inspection Stage Typical Finding Likely Cause Verification Method Recommended Action Safety Check
1. Prepare the work area Oil is visible around the tow truck, boom, wheel-lift, or recovery equipment. The leak location has not yet been identified, or oil has migrated from a higher point. Park on a stable, level surface; clean the exterior; use suitable absorbent material and inspect from the highest wet point downward. Keep the area clean enough to distinguish fresh oil from old residue. Do not use hands to search for pressurized leaks. Wear eye protection and oil-resistant gloves; control spills immediately.
2. Isolate the hydraulic system Hydraulic functions can still move or pressure remains on a gauge. The pump, engine-driven power source, or control circuit has not been fully isolated. Follow the machine isolation procedure: shut down the power source, apply parking brakes, chock wheels, and isolate electrical or mechanical energy where applicable. Use a documented lockout or tagout process and prevent unauthorized re-energization. Apply ISO 4413 isolation principles before loosening any connection.
3. Support suspended equipment Boom, underlift, bed, or cylinder is raised while a leak is being investigated. The load is relying on hydraulic pressure instead of a mechanical support. Confirm that the attachment or raised component is secured with rated mechanical supports designed for the load. Lower equipment to a safe position whenever possible. If not possible, install approved supports before inspection. Never rely on a hydraulic cylinder, hose, or valve to support a raised load.
4. Release stored pressure A fitting remains difficult to loosen, or a cylinder shifts after shutdown. Trapped pressure remains in one or more hydraulic circuits, accumulators, hoses, or actuators. Operate controls only as permitted by the service procedure, open designated bleed or isolation points safely, and check all relevant pressure indicators. Do not loosen fittings until every applicable circuit is relieved and the system is confirmed stable. Treat every line as pressurized until zero stored pressure is verified.
5. Confirm zero pressure The main gauge reads zero, but movement or pressure may remain elsewhere. A gauge does not monitor every branch, actuator, accumulator, or blocked section of the circuit. Check all applicable gauges and test points against the service documentation; confirm no movement occurs and pressure does not rebuild. Record the isolation points and verification results before beginning repairs. Zero pressure must be verified at every relevant circuit, not assumed from one gauge.
6. Inspect hoses and tubes Wetness, abrasion, blistering, cracking, exposed reinforcement, or a damaged bend radius. Age-related deterioration, rubbing, excessive flexing, heat exposure, or incorrect routing. Inspect the complete hose length, fittings, clamps, protective sleeves, and contact points after the system is safely depressurized. Replace damaged hoses with correctly rated assemblies. Correct routing and secure hoses without restricting movement. Never locate a leak by placing a finger or hand near a suspected pinhole.
7. Inspect fittings and seals Oil appears at a threaded joint, adapter, flange, quick coupler, or cylinder rod seal. Loose connection, damaged sealing surface, incorrect seal, contamination, or over-tightening. Clean the joint and inspect for fresh oil after a controlled low-pressure functional check, if authorized. Use the correct replacement seal or fitting and tighten according to the equipment service specification. Do not use sealant or thread tape where it can enter the hydraulic circuit.
8. Check valves and cylinders A cylinder drifts, a valve block is wet, or an actuator moves without a command. Internal seal wear, external seal damage, contamination, valve leakage, or an incorrectly adjusted control. Compare observed drift and leakage with the equipment limits; inspect valve interfaces and cylinder seals after isolation. Repair or replace components using approved parts and test the system under controlled conditions. Secure all loads before testing any component that can affect movement.
9. Check reservoir and filtration Low fluid level, foaming, overheating, contaminated oil, or repeated filter restriction. A leak has lowered the level, air is entering the suction line, the return filter is restricted, or maintenance intervals were missed. Inspect the reservoir level, breather, suction connections, filter indicator, fluid condition, and visible contamination. Repair the source of the leak, replace filters as specified, and refill with compatible clean hydraulic fluid. Prevent dirt and moisture from entering open lines or the reservoir.
10. Test after repair No visible leak at rest, but leakage may return during operation. The repair was not tested at the normal operating range, or another leak source was overlooked. Remove tools and supports only when safe, restore energy under controlled conditions, inspect for leaks, and check pressure, temperature, and function. Run a documented functional test, recheck connections, clean residual oil, and record the repair. Stop immediately if unexpected movement, pressure instability, or renewed leakage occurs.
Critical rule: Do not loosen, disconnect, or repair a hydraulic component until the energy source is isolated, suspended loads are mechanically supported, and zero stored pressure has been verified in every applicable circuit.

Inspect SAE J517 Hoses, Fittings, and Minimum Bend-Radius Requirements

A hydraulic leak on a tow truck often begins at the hose, fitting, or clamp. Start with a clean inspection. Never search for a pinhole leak with bare hands; pressurized oil can penetrate skin. Depressurize the circuit, then check for wetness, abrasion, crushed sections, and loose fittings. SAE J517 defines performance requirements for hydraulic hoses, including pressure capability and construction. Many SAE J517 hose types use a proof pressure near twice working pressure and a minimum burst ratio near four times working pressure. Confirm the exact hose specification before replacing it.

Bend radius deserves closer attention. A hose may look undamaged while internal reinforcement is stressed. Measure the centerline radius during installation, not after failure. SAE J517 tables provide minimum bend-radius values for each hose construction and size. Do not force a tight turn behind the boom or winch frame. Use proper routing, allowing movement without twisting. A fitting can appear tight and still leak when the hose is side-loaded. That is easy to miss.

Tips: Clean the area first. Mark the leak path with chalk. Compare the installed radius with the SAE J517 requirement. Inspect after operating the boom through its full travel. Replace damaged hose assemblies rather than cutting and reusing ends. Record hose size, pressure rating, temperature, and failure location. In practice, records expose repeat problems, though technicians sometimes overlook vibration as the real cause. Also check clamps and supports; excessive restraint can create a new failure point.

Hydraulic Leak Troubleshooting Priorities for Tow Trucks

This illustrative troubleshooting chart ranks the main inspection areas by practical priority. Depressurize the hydraulic system before inspection, check SAE J517 hose covers for abrasion, inspect fittings for looseness or seal damage, and verify that every hose meets its specified minimum bend radius. A hose that is kinked, twisted, crushed, or bent below the manufacturer's minimum radius should be replaced rather than repaired.

Check Hydraulic Fluid Cleanliness Against ISO 4406 Code 18/16/13

When troubleshooting a tow truck hydraulic leak, fluid cleanliness deserves the same attention as pressure and seal condition. ISO 4406 code 18/16/13 is a practical reference for particle contamination. It reports particles at 4, 6, and 14 microns per milliliter. Lower numbers indicate cleaner fluid.

A leaking hose fitting can admit dust during pressure changes. Worn cylinder rod seals may also release rubber particles into the circuit. I usually warm the system, clean the sampling port, and flush the port before collecting fluid. A laboratory particle counter gives more reliable evidence than cloudy oil or a visual jar check. Do not sample from the reservoir surface alone. Sediment may settle at the bottom.

Check the return filter indicator, suction strainer, hose ends, and pump inlet for contamination. If testing shows a result dirtier than 18/16/13, inspect the source before simply changing the filter. Otherwise, fresh debris can quickly return. Use a suitable offline filtration unit when possible, and replace damaged filters with the correct rating. Depressurize the hydraulic circuit before opening any connection. I once trusted clear-looking oil too quickly; that assumption delayed the real diagnosis. Clean appearance is not proof. Sampling technique can also produce misleading results. Record the machine hours, oil temperature, and exact sampling point with every test.

Repair to OEM Torque Values and Retest the System at Rated Pressure

What Is the Best Way to Troubleshoot Tow Truck Hydraulic Leaks?

Hydraulic leaks often begin as a damp fitting, not a visible stream. Clean the area, lower the equipment, and release stored pressure before inspecting it. Wear eye protection and gloves. Never search for a pinhole leak with your hand. Pressurized fluid can penetrate skin and cause serious injury.

Check hoses, cylinders, valves, and threaded connections for fresh oil. Replace damaged seals, cracked hoses, or distorted fittings instead of forcing them back into service. When tightening connections, use the equipment service manual and a calibrated torque wrench. Repair every connection to the specified OEM torque value. Over-tightening can damage threads or crush a seal. Under-tightening may allow another leak. I have seen both mistakes after rushed roadside repairs. Slow work is usually cheaper.

Tips: Mark each repaired fitting before testing. Confirm the pressure gauge is accurate and rated for the system. After assembly, cycle the hydraulic functions slowly, then retest the system at its rated pressure. Do not exceed that pressure. Watch the repaired area from a safe position while the pump runs. Use cardboard or a clean inspection sheet to identify new oil, never your fingers. Wipe the connection, wait several minutes, and inspect again. If pressure drops, noise increases, or the leak returns, stop testing and reassess the component. A second inspection can reveal a misaligned hose or a seal installed imperfectly.

FAQS

What should be done before inspecting a hydraulic leak?

Park on firm, level ground. Apply the parking brake. Support raised equipment mechanically. Never trust hydraulic pressure alone.

How can stored hydraulic pressure be isolated safely?

Stop the engine and isolate electrical and hydraulic energy sources. Follow the approved pressure-release procedure. Bleed fluid through designated ports.

Is a zero gauge reading enough to confirm safe pressure?

Not always. Trapped fluid may remain behind valves or inside accumulators. Use a suitable test method and stay clear of fittings.

How should a suspected pinhole leak be located?

Clean the area first. Use cardboard or an approved detection method. Never use bare fingers. Pressurized fluid can seriously injure skin.

Which components commonly require inspection?

Check hose crimps, fittings, cylinder seals, valves, and abrasion points. Look for fresh oil after cleaning. Dampness may indicate an early leak.

How should hydraulic fluid cleanliness be checked?

Take a properly prepared sample from a suitable sampling point. A laboratory particle counter gives better evidence than cloudy oil. Record oil temperature and machine hours.

What does a cleanliness result dirtier than 18/16/13 suggest?

Inspect the contamination source before changing only the filter. Check strainers, hose ends, pump inlets, and return filters. Clean oil can still mislead.

How should repaired fittings be tightened and tested?

Follow the equipment service manual and use a calibrated torque wrench. Over-tightening can damage seals. Under-tightening can cause another leak.

What is the safest way to retest a repaired system?

Mark the repaired fitting, restore pressure slowly, and cycle functions carefully. Retest at rated pressure only. Stop if pressure drops or leakage returns.

Why is a second inspection worthwhile?

Seepage near clamps or misaligned hoses is easy to miss. I have overlooked small leaks before. Wipe the area, wait several minutes, then inspect again.

Conclusion

To understand how to troubleshoot hydraulic leaks in a tow truck, begin by identifying whether the leak is external, internal, or caused by a pressure-related failure. Trace the hydraulic circuit carefully while the system operates within its normal 2,000–3,000 psi range, using appropriate protective equipment and safe observation methods. Before inspecting any component, follow ISO 4413 isolation practices, shut down the equipment, block moving parts, and verify that all stored pressure has been released.

Next, inspect hoses and fittings for abrasion, cracks, loose connections, and incorrect routing. Confirm that hose installation follows SAE J517 requirements, including the manufacturer’s minimum bend radius. Check fluid cleanliness against ISO 4406 code 18/16/13, since contamination can damage valves and seals. Replace defective parts, tighten connections to the equipment manufacturer’s specified torque values, and refill with suitable clean fluid. Finally, retest the system at its rated pressure, checking for renewed leakage, abnormal movement, pressure loss, and secure operation before returning the tow truck to service.

Sophia

Sophia

Sophia is a dedicated marketing professional with an exceptional depth of knowledge about her company's products and services. With a keen understanding of market trends and customer needs, she crafts insightful blog posts that not only inform but also engage readers, enriching the company’s online......